Using Terraform and Ansible to build Vulnerable Machine
Introduction
I’m going to guide the prerequisite installation required for this document. Break down the steps to manually set up the vulnerable application, then put it all together with Infrastructure as Code (IaC) concept using Terraform and Ansible.
Background
I’m in the role that also does a code review, which exposes me to repositories with code for infrastructure automation tools like Terraform, and Ansible that generally use for a cloud provision on AWS, Azure, GCP, etc. The cloud providers require an account, while some people may prefer to try these tools locally, and I wanted to expand on the previous post prerequisite as a use case to introduce you to the IaC concept.
Prerequisite
I will install Virtualbox in order to leverage the Terra-Farm Virtualbox Provider, and everything is installed and tested on Debian Bullseye.
Virtualbox
Add the public key and the repository source file, and then install the Virtualbox package.
sam:~$ wget -qO - https://www.virtualbox.org/download/oracle_vbox_2016.asc | sudo apt-key add -
OK
sam:~$ sudo tee /etc/apt/sources.list.d/virtualbox.list <<< 'deb https://download.virtualbox.org/virtualbox/debian bullseye contrib'
deb https://download.virtualbox.org/virtualbox/debian bullseye contrib
sam:~$ sudo apt update && sudo apt install virtualbox-6.1 -y
...
Get:4 https://download.virtualbox.org/virtualbox/debian bullseye InRelease [7,735 B]
Get:6 https://download.virtualbox.org/virtualbox/debian bullseye/contrib amd64 Packages [1,447 B]
Fetched 9,182 B in 2s (5,754 B/s)
Reading package lists... Done
...
The following NEW packages will be installed:
  ... virtualbox-6.1
0 upgraded, 26 newly installed, 0 to remove and 4 not upgraded.
Need to get 108 MB of archives.
After this operation, 270 MB of additional disk space will be used.
...
Get:2 https://download.virtualbox.org/virtualbox/debian bullseye/contrib amd64 virtualbox-6.1 amd64 6.1.44-156814~Debian~bullseye [95.7 MB]
Fetched 108 MB in 14s (7,457 kB/s)
Preconfiguring packages ...
...
Setting up virtualbox-6.1 (6.1.44-156814~Debian~bullseye) ...
Adding group `vboxusers' ...
Done.
Install the Virtualbox extension, add the current user to the Virtualbox group and then create the Host-Only networking adapter.
sam:~$ wget https://download.virtualbox.org/virtualbox/6.1.44/Oracle_VM_VirtualBox_Extension_Pack-6.1.44-156814.vbox-extpack
Resolving download.virtualbox.org (download.virtualbox.org)...
Saving to: ‘Oracle_VM_VirtualBox_Extension_Pack-6.1.44-156814.vbox-extpack’
...
sam:~$ yes | sudo vboxmanage extpack install Oracle_VM_VirtualBox_Extension_Pack-6.1.44-156814.vbox-extpack
...
0%...10%...20%...30%...40%...50%...60%...70%...80%...90%...100%
Successfully installed "Oracle VM VirtualBox Extension Pack".
sam:~$ vboxmanage list extpacks
Extension Packs: 1
Pack no. 0:   Oracle VM VirtualBox Extension Pack
Version:      6.1.44
Revision:     156814
...
sam:~$ sudo usermod -a -G vboxusers sam
sam:~$ groups sam
sam : sam ... vboxusers
sam:~$ vboxmanage hostonlyif create
0%...10%...20%...30%...40%...50%...60%...70%...80%...90%...100%
Interface 'vboxnet0' was successfully created
sam:~$ vboxmanage list hostonlyifs
Name:            vboxnet0
...
Terraform
Add the public key and the repository source file, and then install the Terraform package.
sam:~$ wget -qO - https://apt.releases.hashicorp.com/gpg | sudo apt-key add -
OK
sam:~$ sudo tee /etc/apt/sources.list.d/hashicorp.list <<< 'deb https://apt.releases.hashicorp.com bullseye main'
deb https://apt.releases.hashicorp.com bullseye main
sam:~$ sudo apt update && sudo apt install terraform
Hit:2 https://apt.releases.hashicorp.com bullseye InRelease
...
Reading package lists... Done
The following NEW packages will be installed:
  terraform
0 upgraded, 1 newly installed, 0 to remove and 4 not upgraded.
Need to get 21.5 MB of archives.
After this operation, 64.5 MB of additional disk space will be used.
Get:1 https://apt.releases.hashicorp.com bullseye/main amd64 terraform amd64 1.4.6-1 [21.5 MB]
Fetched 21.5 MB in 2s (10.6 MB/s)
(Reading database ... 105197 files and directories currently installed.)
Preparing to unpack .../terraform_1.4.6-1_amd64.deb ...
Unpacking terraform (1.4.6-1) ...
Setting up terraform (1.4.6-1) ...
sam:~$ terraform -version
Terraform v1.4.6
on linux_amd64
Ansible
Install the stable package via APT command.
sam:~$ sudo apt install ansible -y
Reading package lists... Done
Building dependency tree... Done
Reading state information... Done
...
The following NEW packages will be installed:
  ansible ...
0 upgraded, 28 newly installed, 0 to remove and 4 not upgraded.
Need to get 32.9 MB of archives.
After this operation, 280 MB of additional disk space will be used.
...
Get:15 http://deb.debian.org/debian bullseye/main amd64 ansible all 2.10.7+merged+base+2.10.8+dfsg-1 [17.7 MB]
Fetched 32.9 MB in 14s (2,388 kB/s)
...
Selecting previously unselected package ansible.
Preparing to unpack .../14-ansible_2.10.7+merged+base+2.10.8+dfsg-1_all.deb ...
Unpacking ansible (2.10.7+merged+base+2.10.8+dfsg-1) ...
Setting up ansible (2.10.7+merged+base+2.10.8+dfsg-1) ...
...
sam:~$ ansible --version
ansible 2.10.8
  config file = None
  configured module search path = ['/home/sam/.ansible/plugins/modules', '/usr/share/ansible/plugins/modules']
  ansible python module location = /usr/lib/python3/dist-packages/ansible
  executable location = /usr/bin/ansible
  python version = 3.9.2 (default, Feb 28 2021, 17:03:44) [GCC 10.2.1 20210110]
Break it down
In my opinion, this is always the best part. There will be errors, specific package version requirements, old packages that cause conflicting dependencies, and then finally being able to successfully set up the application. To avoid these little challenges I’d break down the steps, and these steps will be a reference to codify everything in the IaC section later. Start from gathering information.
Gathering information
First, you’ll want to know what the operating system and the framework this software uses. Let’s start from the official Dockerfile.
sam:~$ curl https://raw.githubusercontent.com/OWASP/railsgoat/master/Dockerfile
FROM --platform=linux/amd64 ruby:2.6.5
RUN apt-get update -qq && apt-get install -y build-essential libpq-dev nodejs
RUN mkdir /myapp
WORKDIR /myapp
ADD Gemfile /myapp/Gemfile
ADD Gemfile.lock /myapp/Gemfile.lock
RUN gem install bundler -v 1.17.3
RUN bundle install
ADD . /myapp
Notice it pulls from a ruby:2.6.5 tag linux/amd64 system. But what’s the operating system distribution? Following the Docker
image tag will lead to the image
hierarchy.
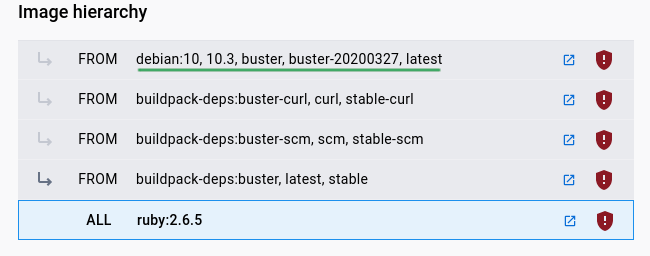
It’s clear from the image hierarchy the OS distribution is Debian Buster. But what is the framework? Let’s inspect the Gemfile.
sam:~$ curl https://raw.githubusercontent.com/OWASP/railsgoat/master/Gemfile
source "https://rubygems.org"

#don't upgrade
gem "rails", "6.0.0"
...
It’s also clear here that the framework uses Rails. The information gathered from the Dockerfile is as follow:
- The OS Distribution is Debian Buster (amd64)
- The Programming Language is Ruby
- The Framework is Rails
- Installed APT packages:
build-essential(usually automatically installed)libpq-dev(does it really use the postgresql database?)nodejs(is this really needed? / optional)
- The specific GEM package installed is Bundler version 1.17.3. Why?
This information will be helpful in the next following sections.
OS Installation
There’s a minimal Debian installer that can be used, but I’ll use the Vagrant Debian Buster box by Boxomatic with the Guest Additions already included. Let’s download, extract and import the image.
sam:~$ mkdir boxes
sam:~$ cd boxes
sam:boxes$ wget https://app.vagrantup.com/boxomatic/boxes/debian-10/versions/20230515.0.1/providers/virtualbox.box
Resolving app.vagrantup.com (app.vagrantup.com)...
Length: 475769255 (454M) [binary/octet-stream]
Saving to: ‘virtualbox.box’
...
sam:boxes$ tar xf virtualbox.box
sam:boxes$ ls -l
total 938340
-rw-r--r-- 1 sam sam 485068288 May 15 11:23 boxomatic-debian-10-disk001.vmdk
-rw-r--r-- 1 sam sam      7308 May 15 11:23 box.ovf
-rw-r--r-- 1 sam sam        26 May 15 11:23 metadata.json
-rw-r--r-- 1 sam sam       258 May 15 11:23 Vagrantfile
-rw-r--r-- 1 sam sam 475769255 Jun  3 14:41 virtualbox.box
sam:boxes$ vboxmanage import -vsys 0 --vmname buster box.ovf
0%...10%...20%...30%...40%...50%...60%...70%...80%...90%...100%
Interpreting /home/sam/boxes/box.ovf...
OK.
...
Virtual system 0:
 0: Suggested OS type: "Debian_64"
 ...
 7: Network adapter: orig NAT, config 3, extra slot=0;type=NAT

0%...10%...20%...30%...40%...50%...60%...70%...80%...90%...100%
Successfully imported the appliance.
sam:boxes$ vboxmanage list vms
"buster" {f1a63cd9-af69-4be2-98ce-2dd6df521cf1}
The OS network adapter is set to NAT by default, so you must add a port forwarding for SSH access before powering on the machine.
sam:boxes$ vboxmanage modifyvm buster --natpf1 "SSH,tcp,127.0.0.1,2222,,22"
sam:boxes$ vboxmanage showvminfo buster --machinereadable | grep Forward
Forwarding(0)="SSH,tcp,127.0.0.1,2222,,22"
sam:boxes$ vboxmanage startvm buster --type headless
Waiting for VM "buster" to power on...
VM "buster" has been successfully started.
Download the Vagrant Insecure Keypair, set the file permission and
use it with the vagrant username to access the machine SSH on port 2222.
sam:boxes$ wget https://raw.githubusercontent.com/hashicorp/vagrant/master/keys/vagrant
Resolving raw.githubusercontent.com (raw.githubusercontent.com)...
HTTP request sent, awaiting response... 200 OK
Length: 1675 (1.6K) [text/plain]
Saving to: ‘vagrant’
...

sam:boxes$ cat vagrant
-----BEGIN RSA PRIVATE KEY-----
MIIEogIBAAKCAQEA6NF8iallvQVp22WDkTkyrtvp9eWW6A8YVr+kz4TjGYe7gHzI
...
sam:boxes$ chmod 600 vagrant
sam:boxes$ ssh -i vagrant -l vagrant -p2222 127.0.0.1
...
Warning: Permanently added '[127.0.0.1]:2222' (ECDSA) to the list of known hosts.
Linux debian 4.19.0-24-amd64 #1 SMP Debian 4.19.282-1 (2023-04-29) x86_64
...
vagrant@debian:~$
The OS language is set to Portuguese - BRAZIL by default, so change the language as you prefer. I’ll set it to English US.
vagrant@debian:~$ env | grep LANG
LANG=pt_BR.UTF-8
vagrant@debian:~$ sudo update-locale LANG=en_US.UTF-8
*** update-locale: Warning: LANGUAGE (pt_BR:pt:en) is not compatible with LANG (en_US.UTF-8). Disabling it.
vagrant@debian:~$ exit
Connection to 127.0.0.1 closed.
sam:boxes$ ssh -i vagrant -l vagrant -p2222 127.0.0.1
Linux debian 4.19.0-24-amd64 #1 SMP Debian 4.19.282-1 (2023-04-29) x86_64
...
vagrant@debian:~$ env | grep LANG
LANG=en_US.UTF-8
APT package installation
Git package is required to clone the repository, and because it doesn’t use the PostgreSQL database, the SQLite and MySQL development metapackage is required. The default Ruby package, the Zlib and shared MIME package to support Nokogiri and the MimeMagic GEM.
vagrant@debian:~$ sudo apt update && sudo apt install \
git ruby-full libpq-dev zlib1g-dev libsqlite3-dev shared-mime-info default-libmysqlclient-dev -y
...
Reading package lists... Done
The following NEW packages will be installed:
  default-libmysqlclient-dev git  ...
  libpq-dev libsqlite3-dev ...
  ruby-full ruby2.5 ruby2.5-dev ...
  shared-mime-info zlib1g-dev ...
0 upgraded, 51 newly installed, 0 to remove and 0 not upgraded.
Need to get 28.0 MB of archives.
After this operation, 129 MB of additional disk space will be used.
...
Setting up libpq5:amd64 (11.20-0+deb10u1) ...
Setting up libpq-dev (11.20-0+deb10u1) ...
Setting up libsqlite3-dev:amd64 (3.27.2-3+deb10u2) ...
Setting up shared-mime-info (1.10-1) ...
Setting up zlib1g-dev:amd64 (1:1.2.11.dfsg-1+deb10u2) ...
Setting up git (1:2.20.1-2+deb10u8) ...
Setting up default-libmysqlclient-dev:amd64 (1.0.5) ...
Setting up ruby2.5 (2.5.5-3+deb10u4) ...
Setting up ruby (1:2.5.1) ...
Setting up ruby2.5-dev:amd64 (2.5.5-3+deb10u4) ...
Setting up ruby-dev:amd64 (1:2.5.1) ...
Setting up ruby-full (1:2.5.1) ...
Processing triggers for libc-bin (2.28-10+deb10u2) ...
...
GEM package installation
Earlier in the gathering information step only one GEM package was installed, but apparently a specific version of the Nokogiri GEM is also required.
vagrant@debian:~$ sudo gem install bundler -v 1.17.3
Fetching: bundler-1.17.3.gem (100%)
Successfully installed bundler-1.17.3
1 gem installed
vagrant@debian:~$ sudo gem install nokogiri -v 1.10.10
Fetching: mini_portile2-2.4.0.gem (100%)
Successfully installed mini_portile2-2.4.0
Fetching: nokogiri-1.10.10.gem (100%)
Building native extensions. This could take a while...
Successfully installed nokogiri-1.10.10
2 gems installed
Setting up the application
Follow the instruction to clone the repository, run the Bundle install, and the database setup command.
vagrant@debian:~$ sudo -i
root@debian:~# git clone https://github.com/OWASP/railsgoat /myapp
Cloning into '/myapp'...
remote: Enumerating objects: 332, done.
remote: Counting objects: 100% (332/332), done.
remote: Compressing objects: 100% (290/290), done.
remote: Total 332 (delta 23), reused 196 (delta 9), pack-reused 0
Receiving objects: 100% (332/332), 3.67 MiB | 985.00 KiB/s, done.
Resolving deltas: 100% (23/23), done.
It’s important to modify the Ruby version in the Gemfile with the system version before running the Bundle install command.
root@debian:~# ruby -v
ruby 2.5.5
root@debian:~# cd /myapp/
root@debian:/myapp# sed -i 's/2.6.5/2.5.5/g' Gemfile
root@debian:/myapp# git diff -U0
diff --git a/Gemfile b/Gemfile
index 451dba6..bf0a986 100644
--- a/Gemfile
+++ b/Gemfile
-ruby "2.6.5"
+ruby "2.5.5"
root@debian:/myapp# bundle install
Fetching gem metadata from https://rubygems.org/..
Fetching gem metadata from https://rubygems.org/...
Resolving dependencies...
...
Bundle complete! 42 Gemfile dependencies, 141 gems now installed.
Use `bundle info [gemname]` to see where a bundled gem is installed.
root@debian:/myapp# rails db:setup
Created database 'db/development.sqlite3'
Created database 'db/test.sqlite3'
Starting up the application
To start the application simply run the rails server command.
root@debian:/myapp# rails server
=> Booting Puma
=> Rails 6.0.0 application starting in development
=> Run `rails server --help` for more startup options
Puma starting in single mode...
* Version 4.3.5 (ruby 2.5.5-p157), codename: Mysterious Traveller
* Min threads: 0, max threads: 16
* Environment: development
* Listening on tcp://127.0.0.1:3000
* Listening on tcp://[::1]:3000
Use Ctrl-C to stop
The server successfully runs on a localhost port 3000. However, it should be run on all IP addresses and started at boot. Start the server
using the puma command line instead and then create the Systemd service unit file and enable it.
^C- Gracefully stopping, waiting for requests to finish
=== puma shutdown: 2023-06-03 13:50:26 -0300 ===
- Goodbye!
Exiting
root@debian:/myapp# cat << EOF > /lib/systemd/system/railsgoat.service
[Unit]
Description=RailsGoat
After=sshd.service

[Service]
Type=simple
WorkingDirectory=/myapp
Environment=HOME=/myapp
Environment=RAILS_ENV=development
ExecStart=/usr/local/bin/puma -b tcp://0.0.0.0:80 --pidfile /myapp/tmp/pids/server.pid
ExecStop=/bin/bash -c "kill -9 \$(cat /myapp/tmp/pids/server.pid)"
PIDFile=/myapp/tmp/pids/server.pid
TimeoutSec=15
Restart=always

[Install]
WantedBy=multi-user.target
EOF
root@debian:/myapp# ls -l /lib/systemd/system/railsgoat.service
-rw-r--r-- 1 root root 408 Jun  3 13:52 /lib/systemd/system/railsgoat.service
root@debian:/myapp# systemctl daemon-reload
root@debian:/myapp# systemctl start railsgoat.service
root@debian:/myapp# systemctl enable railsgoat.service
Created symlink /etc/systemd/system/multi-user.target.wants/railsgoat.service → /lib/systemd/system/railsgoat.service.
root@debian:/myapp# systemctl status railsgoat.service
● railsgoat.service - RailsGoat
   Loaded: loaded (/lib/systemd/system/railsgoat.service; enabled; vendor preset: enabled)
   Active: active (running) since Sat 2023-06-03 13:54:28 -03; 1min 17s ago
 Main PID: 18613 (ruby2.5)
    Tasks: 7 (limit: 2359)
   Memory: 83.2M
   CGroup: /system.slice/railsgoat.service
           └─18613 puma 4.3.5 (tcp://0.0.0.0:80) [myapp]

Jun 03 13:54:28 debian systemd[1]: Started RailsGoat.
Jun 03 13:54:28 debian puma[18613]: Puma starting in single mode...
Jun 03 13:54:28 debian puma[18613]: * Version 4.3.5 (ruby 2.5.5-p157), codename: Mysterious Traveller
Jun 03 13:54:28 debian puma[18613]: * Min threads: 0, max threads: 16
Jun 03 13:54:28 debian puma[18613]: * Environment: development
Jun 03 13:54:33 debian puma[18613]: * Listening on tcp://0.0.0.0:80
Infrastructure as Code (IaC)
Here I’ll start codifying the steps in the Break it down section, and each code will refer to that specific step.
Terraform
The example usage is easy to understand. However,
some of the arguments require
adjustment. For now, set the count argument to 1 and the name to railsgoat. Increase the memory to 1024, and remove the
user_data because it’s deprecated. Set the host_interface to vboxnet0, and the image to the local file location already downloaded
in the OS Installation section.
sam:boxes$ cat << EOF > main.tf
terraform {
  required_providers {
    virtualbox = {
      source = "terra-farm/virtualbox"
      version = "0.2.2-alpha.1"
    }
  }
}

resource "virtualbox_vm" "railsgoat" {
  count     = 1
  name      = "railsgoat"
  image     = pathexpand("~/boxes/virtualbox.box")
  cpus      = 1
  memory    = "1024 mib"

  network_adapter {
    type           = "hostonly"
    host_interface = "vboxnet0"
  }
}

output "IPAddr" {
  value = element(virtualbox_vm.railsgoat.*.network_adapter.0.ipv4_address, 1)
}
EOF
Initialize the Terraform backend and the provider plugin.
sam:boxes$ terraform init
Initializing the backend...

Initializing provider plugins...
- Finding terra-farm/virtualbox versions matching "0.2.2-alpha.1"...
- Installing terra-farm/virtualbox v0.2.2-alpha.1...
- Installed terra-farm/virtualbox v0.2.2-alpha.1 (self-signed, key ID 51EC33490F8CDBE5)
...

Terraform has been successfully initialized!
...
Generate the execution plan and the resource actions.
sam:boxes$ terraform plan -out railsgoat.plan
Terraform used the selected providers to generate the following execution plan...
  + create

Terraform will perform the following actions:

  # virtualbox_vm.railsgoat[0] will be created
  + resource "virtualbox_vm" "railsgoat" {
      + cpus   = 1
      + id     = (known after apply)
      + image  = "/home/sam/boxes/virtualbox.box"
      + memory = "1024 mib"
      + name   = "railsgoat"
      + status = "running"

      + network_adapter {
          + device                 = "IntelPro1000MTServer"
          + host_interface         = "vboxnet0"
          + ipv4_address           = (known after apply)
          + ipv4_address_available = (known after apply)
          + mac_address            = (known after apply)
          + status                 = (known after apply)
          + type                   = "hostonly"
        }
    }

Plan: 1 to add, 0 to change, 0 to destroy.

Changes to Outputs:
  + IPAddr = (known after apply)

Saved the plan to: railsgoat.plan

To perform exactly these actions, run the following command to apply:
    terraform apply "railsgoat.plan"
Apply the plan actions.
sam:boxes$ terraform apply railsgoat.plan
virtualbox_vm.railsgoat[0]: Creating...
virtualbox_vm.railsgoat[0]: Still creating... [10s elapsed]
virtualbox_vm.railsgoat[0]: Still creating... [20s elapsed]
virtualbox_vm.railsgoat[0]: Still creating... [30s elapsed]
virtualbox_vm.railsgoat[0]: Still creating... [40s elapsed]
virtualbox_vm.railsgoat[0]: Still creating... [50s elapsed]
virtualbox_vm.railsgoat[0]: Still creating... [1m0s elapsed]
virtualbox_vm.railsgoat[0]: Still creating... [1m10s elapsed]
virtualbox_vm.railsgoat[0]: Still creating... [1m20s elapsed]
virtualbox_vm.railsgoat[0]: Still creating... [1m30s elapsed]
virtualbox_vm.railsgoat[0]: Creation complete after 1m30s [id=ac3248a5-2e37-41e1-9648-a8e271b01d6b]

Apply complete! Resources: 1 added, 0 changed, 0 destroyed.

Outputs:

IPAddr = "192.168.56.101"
The resource successfully created and the IP address obtained. To access it simply SSH with the same user and private key like earlier.
sam:boxes$ ssh -i vagrant -l vagrant 192.168.56.101
Warning: Permanently added '192.168.56.101' (ECDSA) to the list of known hosts.
Linux debian 4.19.0-24-amd64 #1 SMP Debian 4.19.282-1 (2023-04-29) x86_64

...
vagrant@debian:~$
So far from a resource creation point of view, this is enough. However, the machine will need internet access and unfortunately there’s an issue when using two network adapters (NAT and Host-Only). The temporary workaround is using iptables NAT in the host system…
sam:~$ sudo iptables -A POSTROUTING -t nat -j MASQUERADE
sam:~$ sudo tee /proc/sys/net/ipv4/ip_forward <<< 1
1
…and then add the default route gateway in the guest system.
vagrant@debian:~$ sudo ip route replace default via 192.168.56.1
vagrant@debian:~$ ping 8.8.8.8 -c 1
PING 8.8.8.8 (8.8.8.8) 56(84) bytes of data.
64 bytes from 8.8.8.8: icmp_seq=1 ttl=61 time=38.5 ms

--- 8.8.8.8 ping statistics ---
1 packets transmitted, 1 received, 0% packet loss, time 0ms
rtt min/avg/max/mdev = 38.514/38.514/38.514/0.000 ms
Ansible
First of all, create the default configuration file and then set the host key checking to avoid SSH prompts.
sam:boxes$ cat << EOF > ansible.cfg
[defaults]
host_key_checking = False
EOF
Create the primary playbook file, define vagrant as the remote user, set become attribute to yes to execute commands with
Sudo, and define the default roles.
sam:boxes$ cat << EOF > railsgoat.yaml
---
- name: Setting up RailsGoat
  hosts: all
  remote_user: vagrant
  become: yes

  roles:
  - railsgoat
EOF
Roles in Ansible is actually a task or a set of actions that’s executed by its order. Therefore, the very first task should be adding a default route because the installation tasks need access to the internet. I’d use the builtin Shell module.
sam:boxes$ mkdir -p roles/railsgoat/tasks/
sam:boxes$ cat << EOF > roles/railsgoat/tasks/main.yaml
---
- name: Add default route
  ansible.builtin.shell: ip route replace default via 192.168.56.1
EOF
Reset the default route that manually set earlier, exit from the machine, and then run the playbook. See if it worked.
vagrant@debian:~$ sudo route del default gw 192.168.56.1
vagrant@debian:~$ exit
sair
Connection to 192.168.56.101 closed.
sam:boxes$ ansible-playbook -i 192.168.56.101, --private-key vagrant railsgoat.yaml

PLAY [Setting up RailsGoat] ************************************************************

TASK [Gathering Facts] *****************************************************************
ok: [192.168.56.101]

TASK [railsgoat : Add default route] ***************************************************
changed: [192.168.56.101]

PLAY RECAP *****************************************************************************
192.168.56.101             : ok=2    changed=1    unreachable=0    failed=0    skipped=0    rescued=0    ignored=0
sam:boxes$ ssh -i vagrant -l vagrant 192.168.56.101
Linux debian 4.19.0-24-amd64 #1 SMP Debian 4.19.282-1 (2023-04-29) x86_64
...
vagrant@debian:~$ ping -c 1 8.8.8.8
PING 8.8.8.8 (8.8.8.8) 56(84) bytes of data.
64 bytes from 8.8.8.8: icmp_seq=1 ttl=61 time=32.9 ms
...
vagrant@debian:~$ sudo route -n
Tabela de Roteamento IP do Kernel
Destino         Roteador        MáscaraGen.    Opções Métrica Ref   Uso Iface
0.0.0.0         192.168.56.1    0.0.0.0         UG    0      0        0 eth0
The route successfully added, but notice the language must be changed too. Let’s grab the earlier command and add it to the task.
sam:boxes$ cat << EOF >> roles/railsgoat/tasks/main.yaml

- name: Set en_US as default locale
  ansible.builtin.command: update-locale LANG=en_US.UTF-8
EOF
sam:boxes$ ansible-playbook -i 192.168.56.101, --private-key vagrant railsgoat.yaml
...

TASK [railsgoat : Set en_US as default locale] *****************************************
changed: [192.168.56.101]

PLAY RECAP *****************************************************************************
192.168.56.101             : ok=3    changed=2    unreachable=0    failed=0    skipped=0    rescued=0    ignored=0
sam:boxes$ ssh -i vagrant -l vagrant 192.168.56.101
Linux debian 4.19.0-24-amd64 #1 SMP Debian 4.19.282-1 (2023-04-29) x86_64
...
vagrant@debian:~$ env | grep LANG
LANG=en_US.UTF-8
Next task should be the APT package installation step using the builtin APT module…
sam:boxes$ cat << EOF >> roles/railsgoat/tasks/main.yaml

- name: Installing APT dependencies
  ansible.builtin.apt:
    update_cache: yes
    pkg:
    - git
    - ruby-full
    - libpq-dev
    - zlib1g-dev
    - libsqlite3-dev
    - shared-mime-info
    - default-libmysqlclient-dev
EOF
sam:boxes$ ansible-playbook -i 192.168.56.101, --private-key vagrant railsgoat.yaml
...

TASK [railsgoat : Installing APT dependencies] *****************************************
changed: [192.168.56.101]

PLAY RECAP *****************************************************************************
192.168.56.101             : ok=4    changed=3    unreachable=0    failed=0    skipped=0    rescued=0    ignored=0
…and the GEM package installation step using the builtin
GEM module with a loop control.
sam:boxes$ cat << EOF >> roles/railsgoat/tasks/main.yaml

- name: Installing GEM dependencies
  community.general.gem:
    name: ""
    version: ""
    user_install: no
  loop:
    - name: bundler
      version: 1.17.3
    - name: nokogiri
      version: 1.10.10
  loop_control:
    label: ""
EOF
sam:boxes$ ansible-playbook -i 192.168.56.101, --private-key vagrant railsgoat.yaml
...

TASK [railsgoat : Installing GEM dependencies] *****************************************
changed: [192.168.56.101] => (item=bundler)
changed: [192.168.56.101] => (item=nokogiri)

PLAY RECAP *****************************************************************************
192.168.56.101             : ok=5    changed=3    unreachable=0    failed=0    skipped=0    rescued=0    ignored=0
Add the Git clone, Gemfile modification, Bundle install, and database setup commands from the Setting up the application step using the builtin Git, Replace and Bundler module.
sam:boxes$ cat << EOF >> roles/railsgoat/tasks/main.yaml

- name: Cloning RailsGoat repository
  ansible.builtin.git:
    repo: https://github.com/OWASP/railsgoat
    dest: /myapp
    force: yes
EOF
sam:boxes$ cat << EOF >> roles/railsgoat/tasks/main.yaml

- name: Modify Ruby version in Gemfile
  ansible.builtin.replace:
    path: /myapp/Gemfile
    regexp: '(^ruby ")(.*)"'
    replace: '\g<1>2.5.5"'
EOF
sam:boxes$ cat << EOF >> roles/railsgoat/tasks/main.yaml

- name: Installing BUNDLE dependencies
  community.general.bundler:
    chdir: /myapp
    user_install: no
EOF
The database setup commands will run only if the development.sqlite3 file doesn’t exist.
sam:boxes$ cat << EOF >> roles/railsgoat/tasks/main.yaml

- name: Setup RailsGoat database
  ansible.builtin.command: /usr/local/bin/rails db:setup
  args:
    chdir: /myapp
    creates: /myapp/db/development.sqlite3
EOF
sam:boxes$ ansible-playbook -i 192.168.56.101, --private-key vagrant railsgoat.yaml
...

TASK [railsgoat : Cloning RailsGoat repository] ****************************************
changed: [192.168.56.101]

TASK [railsgoat : Modify Ruby version in Gemfile] **************************************
changed: [192.168.56.101]

TASK [railsgoat : Installing BUNDLE dependencies] **************************************
changed: [192.168.56.101]

TASK [railsgoat : Setup RailsGoat database] ********************************************
changed: [192.168.56.101]

PLAY RECAP *****************************************************************************
192.168.56.101             : ok=9    changed=6    unreachable=0    failed=0    skipped=0    rescued=0    ignored=0
Finally, add and enable the Systemd service unit file from the Starting up the application step using the builtin Copy and Systemd module.
sam:boxes$ cat << EOF >> roles/railsgoat/tasks/main.yaml

- name: Add RailsGoat systemd service unit
  copy:
    dest: /lib/systemd/system/railsgoat.service
    content: |
             [Unit]
             Description=RailsGoat
             After=sshd.service

             [Service]
             Type=simple
             WorkingDirectory=/myapp
             Environment=HOME=/myapp
             Environment=RAILS_ENV=development
             ExecStart=/usr/local/bin/puma -b tcp://0.0.0.0:80 --pidfile /myapp/tmp/pids/server.pid
             ExecStop=/bin/bash -c "kill -9 \$(cat /myapp/tmp/pids/server.pid)"
             PIDFile=/myapp/tmp/pids/server.pid
             TimeoutSec=15
             Restart=always

             [Install]
             WantedBy=multi-user.target
EOF
The /myapp/tmp/pids directory doesn’t exist by default, so it has to be created using the builtin
File module before starting the service.
sam:boxes$ cat << EOF >> roles/railsgoat/tasks/main.yaml

- name: Create RailsGoat PID directory
  ansible.builtin.file:
    path: /myapp/tmp/pids
    state: directory
EOF
sam:boxes$ cat << EOF >> roles/railsgoat/tasks/main.yaml

- name: Start and enable RailsGoat service at boot
  ansible.builtin.systemd:
    name: railsgoat
    state: started
    enabled: true
    daemon_reload: true
EOF
sam:boxes$ ansible-playbook -i 192.168.56.101, --private-key vagrant railsgoat.yaml
...

TASK [railsgoat : Add RailsGoat systemd service unit] **********************************
changed: [192.168.56.101]

TASK [railsgoat : Create RailsGoat PID directory] **************************************
changed: [192.168.56.101]

TASK [railsgoat : Start and enable RailsGoat service at boot] **************************
changed: [192.168.56.101]

PLAY RECAP *****************************************************************************
192.168.56.101             : ok=12   changed=7    unreachable=0    failed=0    skipped=0    rescued=0    ignored=0
Put it together
Finally, put Terraform and Ansible together using the combination of Remote and Local provisioner. The trick is when the machine successfully created, use the Remote Exec provision to wait until its SSH connection is ready, and then execute the Ansible playbook using the Local Exec provision. But before doing that, let’s have a fresh start by destroying the already created resource.
sam:boxes$ terraform destroy -auto-approve
virtualbox_vm.railsgoat[0]: Refreshing state... [id=ac3248a5-2e37-41e1-9648-a8e271b01d6b]

Terraform used the selected providers to generate the following execution plan...
  - destroy

Terraform will perform the following actions:

  # virtualbox_vm.railsgoat[0] will be destroyed
  ...

Plan: 0 to add, 0 to change, 1 to destroy.

Changes to Outputs:
  - IPAddr = "192.168.56.101" -> null
virtualbox_vm.railsgoat[0]: Destroying... [id=ac3248a5-2e37-41e1-9648-a8e271b01d6b]
virtualbox_vm.railsgoat[0]: Destruction complete after 1s

Destroy complete! Resources: 1 destroyed.
Declare Local Values for the user and private
key reference in the main.tf file.
terraform {
  required_providers {
    ...
  }
}

locals {
  remote_user = "vagrant"
  remote_private_key = "vagrant"
}
Now added the remote-exec and local-exec provisioner block inside the resource just after the network_adapter block like this.
resource "virtualbox_vm" "railsgoat" {
  ...
  network_adapter {
    type           = "hostonly"
    host_interface = "vboxnet0"
  }

  provisioner "remote-exec" {
    inline = ["echo 'Wait until SSH is ready'"]

    connection {
      type        = "ssh"
      user        = local.remote_user
      private_key = file(local.remote_private_key)
      host        = element(virtualbox_vm.railsgoat.*.network_adapter.0.ipv4_address, 1)
    }
  }

  provisioner "local-exec" {
    command = "ansible-playbook -i ${element(virtualbox_vm.railsgoat.*.network_adapter.0.ipv4_address, 1)}, --private-key ${local.remote_private_key} railsgoat.yaml"
  }
}
Because Terraform is declarative, the local-exec block will only execute if the remote-exec connection is established. Lastly, update
the plan and apply it once more.
sam:boxes$ terraform plan -out railsgoat.plan

Terraform used the selected providers to generate the following execution plan...
  + create
  ...

Saved the plan to: railsgoat.plan

To perform exactly these actions, run the following command to apply:
    terraform apply "railsgoat.plan"
sam:boxes$ terraform apply railsgoat.plan
virtualbox_vm.railsgoat[0]: Creating...
virtualbox_vm.railsgoat[0]: Still creating... [10s elapsed]
virtualbox_vm.railsgoat[0]: Still creating... [20s elapsed]
virtualbox_vm.railsgoat[0]: Provisioning with 'remote-exec'...
virtualbox_vm.railsgoat[0] (remote-exec): Connecting to remote host via SSH...
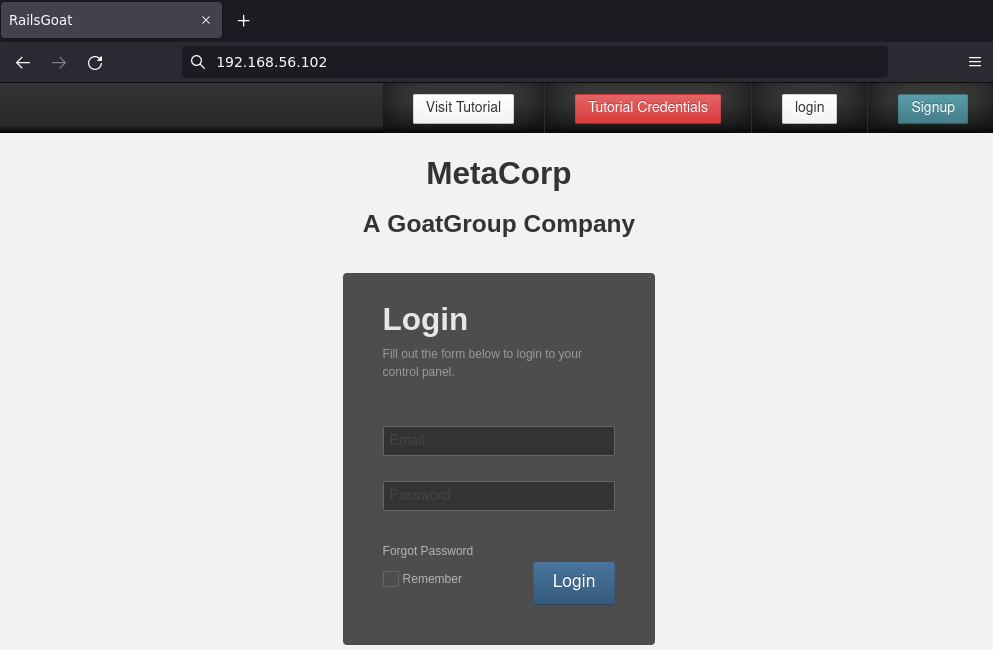
virtualbox_vm.railsgoat[0] (remote-exec): Host: 192.168.56.102
virtualbox_vm.railsgoat[0] (remote-exec): User: vagrant
virtualbox_vm.railsgoat[0] (remote-exec): Password: false
virtualbox_vm.railsgoat[0] (remote-exec): Private key: true
virtualbox_vm.railsgoat[0] (remote-exec): Certificate: false
virtualbox_vm.railsgoat[0] (remote-exec): SSH Agent: false
virtualbox_vm.railsgoat[0] (remote-exec): Checking Host Key: false
virtualbox_vm.railsgoat[0] (remote-exec): Target Platform: unix
virtualbox_vm.railsgoat[0] (remote-exec): Connected!
virtualbox_vm.railsgoat[0] (remote-exec): Wait until SSH is ready
virtualbox_vm.railsgoat[0]: Provisioning with 'local-exec'...
virtualbox_vm.railsgoat[0] (local-exec): Executing: ["/bin/sh" "-c" "ansible-playbook -i 192.168.56.102, --private-key vagrant railsgoat.yaml"]
virtualbox_vm.railsgoat[0]: Still creating... [1m20s elapsed]
virtualbox_vm.railsgoat[0] (local-exec): PLAY [Setting up Railsgoat] ****************************************************
virtualbox_vm.railsgoat[0] (local-exec): TASK [Gathering Facts] *********************************************************
virtualbox_vm.railsgoat[0] (local-exec): ok: [192.168.56.102]
virtualbox_vm.railsgoat[0] (local-exec): TASK [railsgoat : Installing APT dependencies] *********************************
virtualbox_vm.railsgoat[0] (local-exec): changed: [192.168.56.102]
virtualbox_vm.railsgoat[0] (local-exec): TASK [railsgoat : Installing GEM dependencies] *********************************
virtualbox_vm.railsgoat[0] (local-exec): changed: [192.168.56.102] => (item=bundler)
virtualbox_vm.railsgoat[0] (local-exec): changed: [192.168.56.102] => (item=nokogiri)
virtualbox_vm.railsgoat[0] (local-exec): TASK [railsgoat : Cloning RailsGoat repository] ********************************
virtualbox_vm.railsgoat[0] (local-exec): changed: [192.168.56.102]
virtualbox_vm.railsgoat[0] (local-exec): TASK [railsgoat : Modify Ruby version in Gemfile] ******************************
virtualbox_vm.railsgoat[0] (local-exec): changed: [192.168.56.102]
virtualbox_vm.railsgoat[0] (local-exec): TASK [railsgoat : Installing BUNDLE dependencies] ******************************
virtualbox_vm.railsgoat[0] (local-exec): changed: [192.168.56.102]
virtualbox_vm.railsgoat[0] (local-exec): TASK [railsgoat : Setup RailsGoat database] ************************************
virtualbox_vm.railsgoat[0] (local-exec): changed: [192.168.56.102]
virtualbox_vm.railsgoat[0] (local-exec): TASK [railsgoat : Add RailsGoat systemd service unit] **************************
virtualbox_vm.railsgoat[0] (local-exec): changed: [192.168.56.102]
virtualbox_vm.railsgoat[0] (local-exec): TASK [railsgoat : Create RailsGoat PID directory] ******************************
virtualbox_vm.railsgoat[0] (local-exec): changed: [192.168.56.102]
virtualbox_vm.railsgoat[0] (local-exec): TASK [railsgoat : Start and enable RailsGoat service at boot] ******************
virtualbox_vm.railsgoat[0] (local-exec): changed: [192.168.56.102]
virtualbox_vm.railsgoat[0] (local-exec): PLAY RECAP *********************************************************************
virtualbox_vm.railsgoat[0] (local-exec): 192.168.56.102 : ok=16 changed=15 unreachable=0 failed=0 skipped=0 rescued=0 ignored=0
virtualbox_vm.railsgoat[0]: Creation complete after 6m34s [id=bd97b033-7b51-469a-8b9c-16cb0b8f0974]
Apply complete! Resources: 1 added, 0 changed, 0 destroyed.
Outputs:
IPAddr = "192.168.56.102"
Grab all the build code here.
Conclusion
The technology industry has been moving towards cloud computing, virtualization, and therefore the IaC concept will help the automation and
scaling. But not to scale more vulnerable systems, that would be a good bad idea. Use this approach to break down your systems or
applications installations in parts, codify each part, and then put it together. Here’s a food for thought, what operating system
distribution do you use? What type of tools do you use daily? Have some you can’t live without? Have you ever wanted to try new tools
without a fear of breaking your current OS? Having a Host system that’s virtualized and concurrently used as a Guest system is definitely an
advantage, right?
References
Infrastructure as Code (IaC), Terraform, Ansible, Cloud Computing, AWS, Azure, GCP, RailsGoat, Combinining SCA, SAST, and DAST to find Exploitation path, Virtualbox, Terra-Farm Virtualbox, Debian Bullseye, VirtuaBox Host-Only, Terraform Package Guide, Ansible Package, Ruby Docker, Ruby Docker Hierarchy, Debian Buster, Ruby, Rails, Bundler, Vagrant Debian Boxes, Vagrant Insecure Keypair, Git Package, SQLite Package, MySQL Package, Ruby Package, Zlib Package, Shared MIME Package, Nokogiri, MimeMagic, Systemd, Terra-Farm Virtualbox Network Issue, NAT Iptables, Sudo, Ansible Shell, Ansible APT, Ansible GEM, Ansible Git, Ansible Replace, Ansible Bundler, Ansible Copy, Ansible Systemd, Ansible File, Terraform Remote, Terraform Local, Terraform Local Values